- ダウンロードしたツールの展開(2022/12 時点の最新バージョン ver_2.38.1)
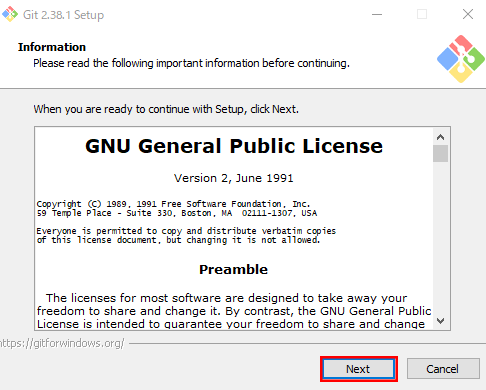
- 1. Information
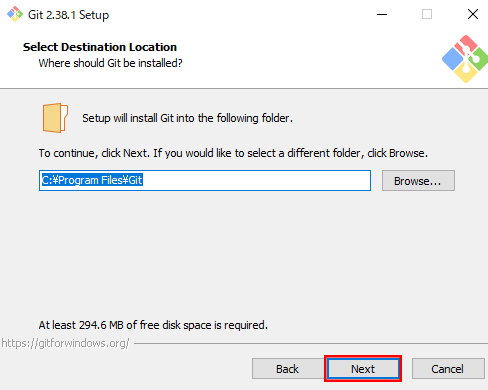
- 2. Select will Destnation Location
- 3. Select Components
- 4. Select Start Menu Folder
- 5. Choosing the default editor used by Git
- 6. Adjusting the name of the initial branch in new repositories
- 7. Adjustting your PATH environment
- 8. Choosing the SSH executable
- 9. Choosing HTTPS transport backend
- 10. Configuring the line ending conversions
- 11. Configring the terminal emulator to use with Git bash
- 12. Choose the default behavior of ‘git pull’
- 13. Choose a credential helper
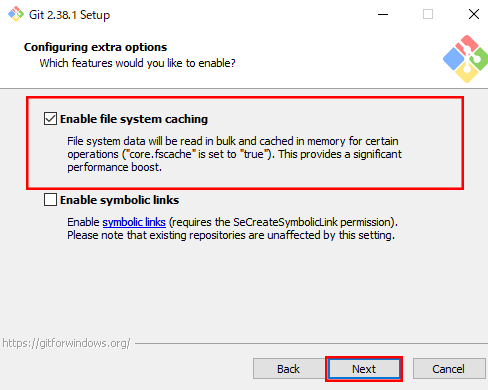
- 14. Configuring extra options
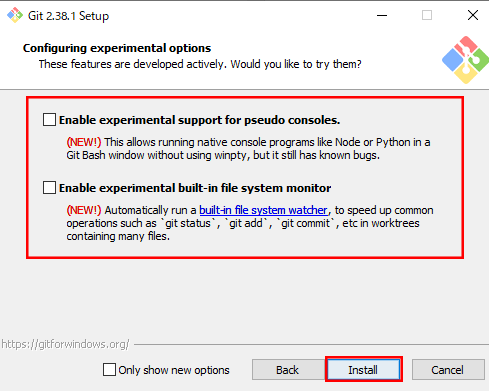
- 15. Configring experimental options
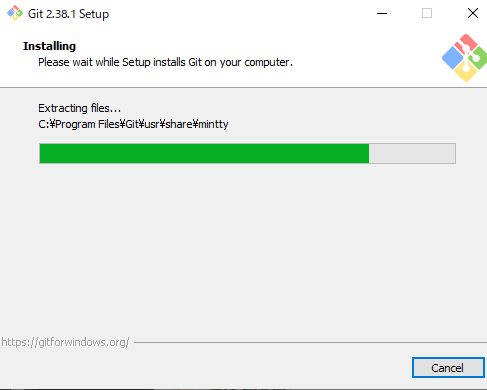
- 16. Installing
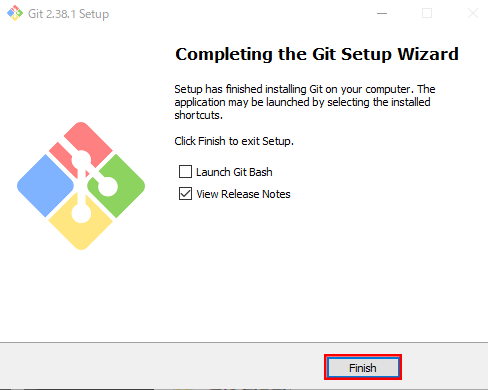
- 17. Completing the Git Setup Wizard
主のPC環境一覧
PC:Windows10, Mac OS [Monterey]
CPU:Intel Core i7
Memory:32GB
Git:2.35.1
– Windows 編 –
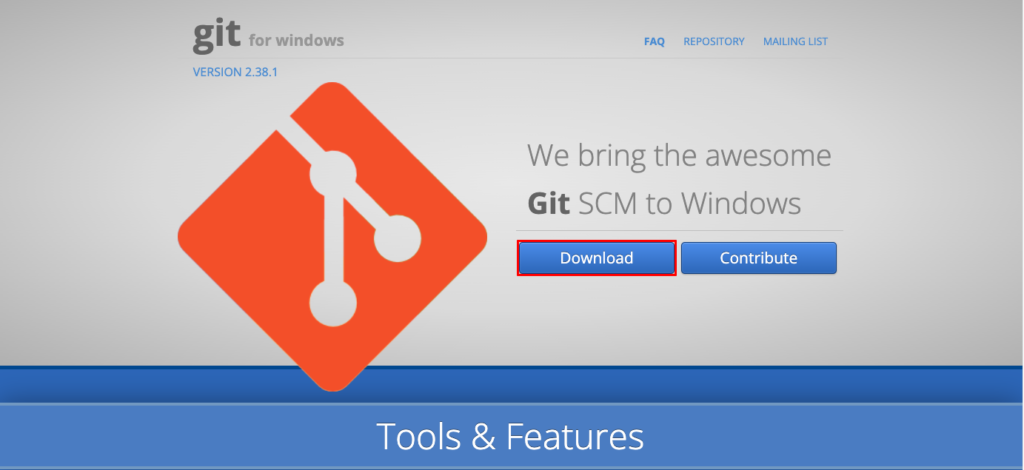
[1] Git ダウンロード (Windows)
以下のサイト(公式)から、Gitをダウンロードしてください。
https://gitforwindows.org/
1. 以下、画像の「Download」ボタンをクリック
[2] Git インストール
ダウンロードしたツールの展開
(2022/12 時点の最新バージョン ver_2.38.1)
ダウンロードされた「Git-2.38.1-64-bit.exe」をダブルクリック

1. Information
内容に同意し「Next」をクリック
【説明】
利用規約
2. Select will Destnation Location
何も変更することなく「Next」をクリック
【説明】
インストールフォルダの指定
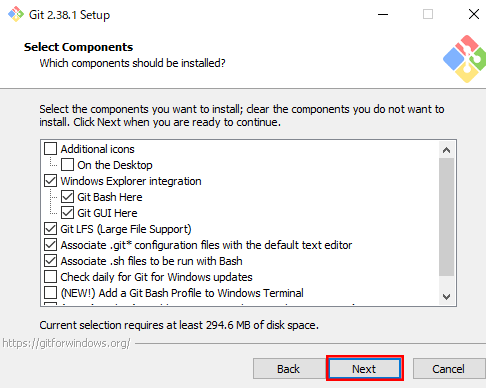
3. Select Components
必要な項目にチェックを入れ「Next」をクリック
【説明】
☑ Additional Ions
└ ☑ On the Desktop
Git Bash起動のショートカットをデスクトップに配置
☑ Windows Exploer integration
├ ☑ Git Bash Here
└ ☑ Git GUI Here
エクスプローラー上で右クリック時のコンテキストメニューに関する設定
チェックを入れるとコンテキストメニューから上記 2つを選択可能(※推奨)
☑ Git LFS (Large File Support)
GItを利用したサービス(GitHub 等)を利用時、関連するバージョンを遅れて
ダウンロードすることで大容量ファイルが使用のリポジトリに及ぼす影響を軽減
☑ Associate .git* configuration files with the default text editor
「.git」で始まる設定ファイルを既定のテキストエディターと関連付け
☑ Associate .sh file to be run with Bash
「.sh」ファイルを Git Bashで実行する
□ Check daily for Git for Windows updates
Git for Windowsのアップデートがあるかを毎日確認する
☑ (NEW) Add a Git Bash Profile to Windows Terminal
Windows Terminalに Git Bashを導入(※Windows Terminalを使用している方は推奨)
☑ (NEW) Scalar (Git add-on to manage large-scale repositories)
大規模な Gitリポジトリの操作を高速化するコマンドの追加
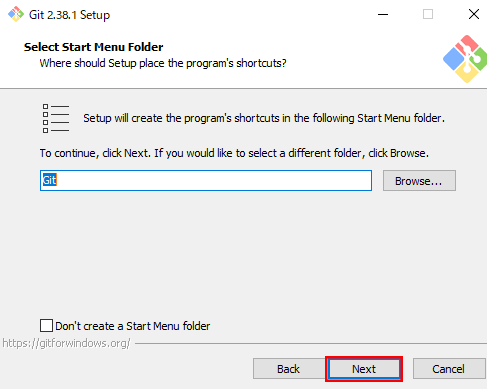
4. Select Start Menu Folder
何も変更することなく「Next」をクリック
【説明】
Windowsスタートメニューに表示するフォルダ名を設定
スタートメニューにフォルダを作成しない場合は「Don’t create a Start Menu folder」にチェック
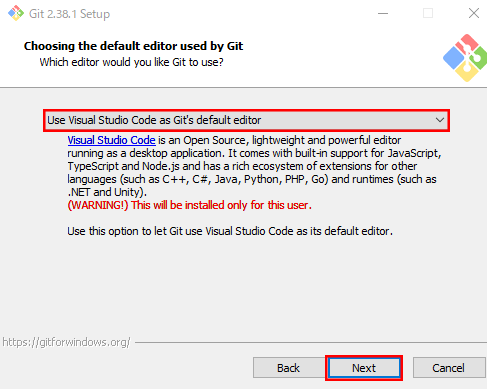
5. Choosing the default editor used by Git
任意の項目を選択し「Next」をクリック
【説明】
デフォルトのエディター設定
私は「Visual Studio Code」が大好きマンなので以下を選択
→「Use Visual Studio Code as Git’s default editor」
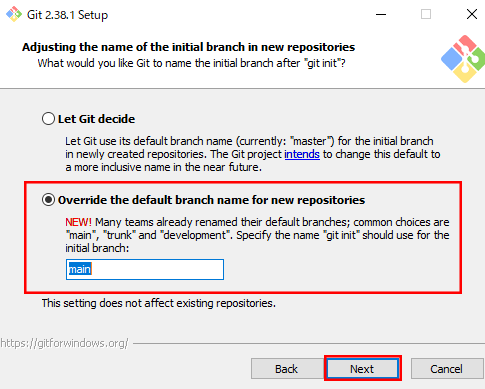
6. Adjusting the name of the initial branch in new repositories
「Override the default branch name of new repositories」を選択し、テキストボックスに「main」と入力し「Next」をクリック
【説明】
新規リポジトリを作成する際にデフォルトブランチ名を設定
「Let Git decide」を選択すると「master」が設定
※「main」が推奨される理由は以下で少し説明していますので興味がございましたら。
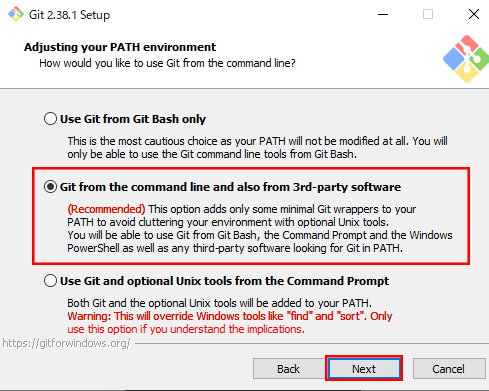
7. Adjustting your PATH environment
「Git from the command line and also from 3rd-party software」を選択し「Next」をクリック
【説明】
・Use Git Bash only
Windows環境変数「PATH」に登録しない
※Gitを「Git Bash」のみで利用する場合に選択
・Git from the command line and also from 3rd-party software
Windows環境変数「PATH」に登録する
※Gitを コマンドプロンプトや PowerShellで利用する場合に選択
※環境変数へ「C:\Program Files\Git\cmd」を自動的に追加してくれる
・Use Git and optional Unix tools from the Command Prompt
コマンドプロンプトや PowerShellで Unixコマンドが使用可能になる
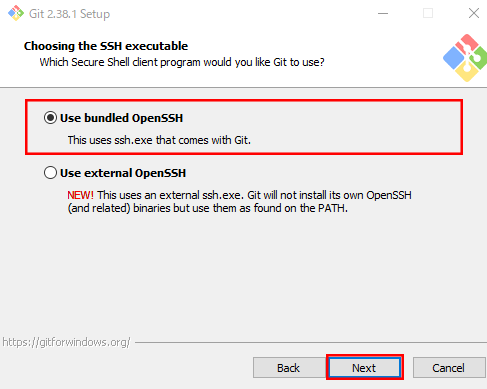
8. Choosing the SSH executable
「Use bundled OpenSSH」を選択し「Next」をクリック
【説明】
Gitで SSHを使用し操作をする際に、Gitが持つ OpenSSHを使用するもしくは、外部の OpenSSHを使用するかの選択
※特に指定がなければデフォルトで良い
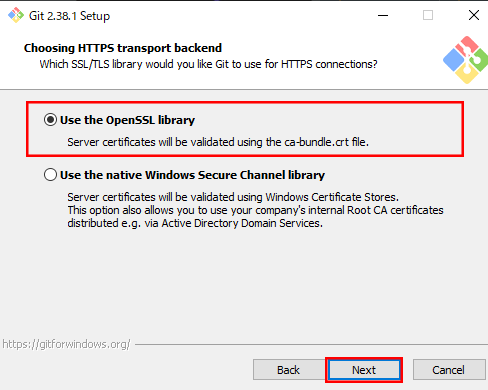
9. Choosing HTTPS transport backend
「Use the OpenSSH library」を選択し「Next」をクリック
【説明】
・Use the OpenSSH library
OpenSSHが持つルート証明書を使用
・Use the native Windows Secure Channel library
Windowsの Secure Channelのルート証明書を使用
※特に指定がなければデフォルトで良い
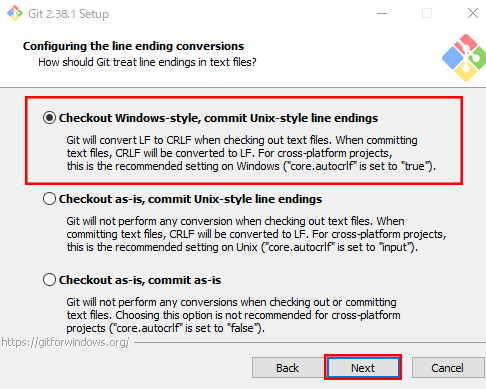
10. Configuring the line ending conversions
「Checkout Windows-style, commit Unix-style line endings」を選択し「Next」をクリック
【説明】
・Checkout Windows-style, commit Unix-style line endings
Checkout時に改行コードを「CR LF」に変換、Commit時に改行コードを全て「LF」に変換
・Checkout as-is, commit Unix-style line endings
Checkout時に改行コードは何もしない、Commit時に改行コードを全て「LF」に変換
・Checkout as-is, commit as-is
Checkout時に改行コードは何もしない、Commit時に改行コードは何もしない
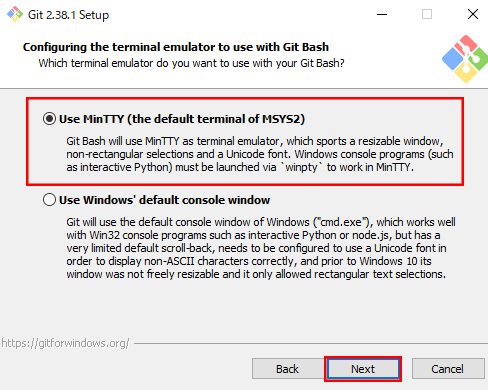
11. Configring the terminal emulator to use with Git bash
「Use MinTTY (the default terminal of MSY2)」を選択し「Next」をクリック
【説明】
Git Bahで使用するコンソールを選択
・Use MinTTY (the default terminal of MSY2)
MinTTY(Cygwinで使用されているコンソール)を使用
・Use Windows’ default console window
Windows標準のコンソールを使用
※特に指定がなければデフォルトで良い
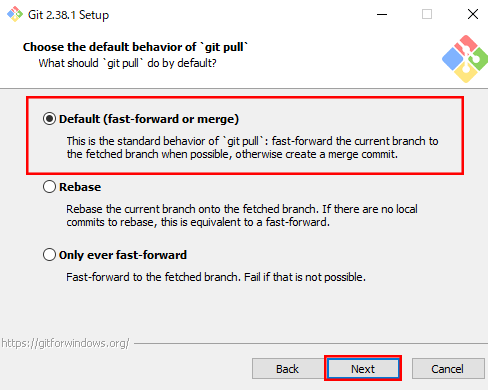
12. Choose the default behavior of ‘git pull’
「Default (fast-forward or merge)」を選択し「Next」をクリック
【説明】
「$ git pull」で mergeを行う際の挙動を選択
※特に指定がなければデフォルトで良い
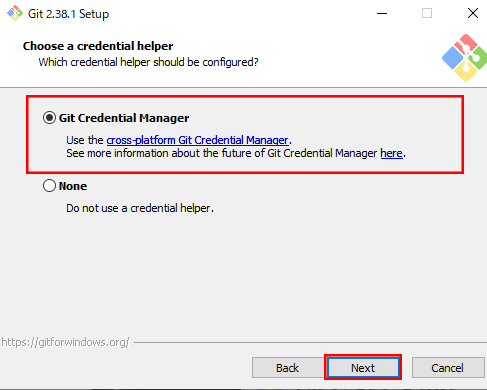
13. Choose a credential helper
「Git Credential Manager」を選択し「Next」をクリック
【説明】
資格情報マネージャー(Credential Manager)の選択
入力を最初のみ行い、後の入力を省略することが可能
※特に指定がなければデフォルトで良い
14. Configuring extra options
「Enable file system caching」を選択し「Next」をクリック
【説明】
追加オプションの設定
・Enable file system caching
Git関連のファイルをキャッシュし動作を高速化する
・Enable Symbolic links
リポジトリ内でシンボリックリンクを使用する
※特に指定がなければデフォルトで良い
15. Configring experimental options
どれにもチェックを入れず「Next」をクリック
【説明】
開発中の機能のため、意図せぬ動作をする場合がある
16. Installing
待機!
【説明】
動かざること山のごとし
17. Completing the Git Setup Wizard
「Finish」をクリック
【説明】
「お疲れ様です。」と同義
– Mac 編 –
[1] Git インストール (Mac)
※Homebrewが既にインストールされていることが条件
(時間ができたら、Homebrewのインストール方法も書いておきます)
1. brewコマンド実行
以上!!
【説明】
本当に終了を指す
$ brew install git– 最後に –
[1] Git が本当に入っているかの確認
1. Gitコマンド実行
以下が表示されていたら完璧です。
【余談】
聞くところによると SVN使用している人って、まだ結構いるんですねぇ
個人的に私は好きじゃありませヌ
$ git -v

# git version 2.38.1

comment 📝